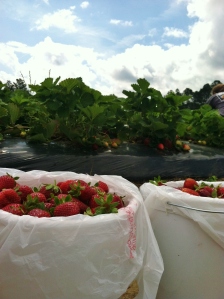
June is starting off right. The sky is impossibly blue, the pollen count has finally gone down, and the summer fruits are starting to pour in. Eleta (of Bungalow Kitchen) and I took some time early Thursday morning to perform that great rite of Southern summer passage – strawberry picking.
I wasn’t kidding about that sky.
We made our way to Elliott Farms for a u-pick bonanza of Bibb County’s most glorious berries and each walked away with about 10lbs of fruit (priced at a steal of $2.50/lb). I’ve had a tart pan sitting unused in my kitchen for months now, so I immediately thought of a yummy strawberry tart. Because I trust the dear Contessa on her baked goods far more than, say, a certain blonde convicted federal offender whose recipes never turn out, I leaned heavily on Ina Garten for this tartventure. I wanted more flavor than simply a basic custard, though, and thought strawberries and grapefruit went quite nicely together. We will divide this into shell and filling, because they really are totally separate until the 5 minutes before serving.
Shell Ingredients (for one 8″ tart, but can also be divided to make 4 individual portions)
- 1 1/4 cups flour
- 3 tbsp sugar
- 1/2 tsp salt
- 6 tbsp cold butter, cut into about a 1/4″ dice
- 2 tbsp shortening, chilled
- 1/4 cup ice water
- aluminum foil and dry rice or beans for weight
For this grand crusty adventure, I got to use both of my favorite mighty kitchen tools – the KitchenAid stand mixer and the ancient and all-powerful Cuisinart food processor. Both weigh about the same…
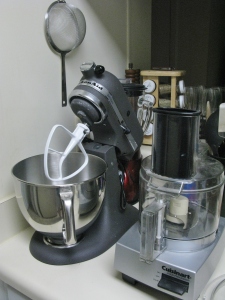
Muahaha!!!
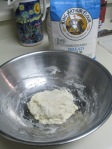
First, the food processor. Sift your dry ingredients into a small bowl. Ina says to freeze this for 30 minutes, but I’m not quite sure why since the flour doesn’t really get all that cold… Maybe it’s to remove any excess moisture? *shrug* Fill up the food processor with the flour, diced butter, and shortening. Give it a good whirl until the butter and shortening are evenly distributed in small bits throughout, then sloooooooowly pour the cold water in until the dough looks almost pellet-like. It will be very sticky and should come together in a ball in your hand with little pressure. Do just that, and shape the ball into a disc about 1-2″ thick on a VERY well floured surface (this shit is super sticky). Wrap the disc in plastic wrap or parchment paper and chill it for 30 minutes minimum, but more if you’d like. You can make the cream filling while you wait or do it later while the shell is cooling. Totally up to you. Preheat thy oven to 375*.
Once you’ve chilled your disc of dough, roll it out (again, VERY well floured surface) to about a 1/4″ thickness.
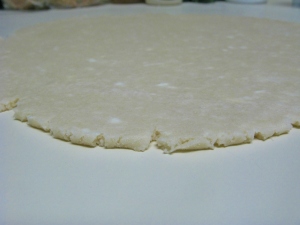
Like so.
Carefully lift the dough and center it over your tart pan. Fit it in without stretching it too much – you want the crust to stay that thick so it holds itself up after baking. The easy way to trim off the edges at this point is simply to roll your rolling pin over the pan and take off the excess cookie cutter-style.
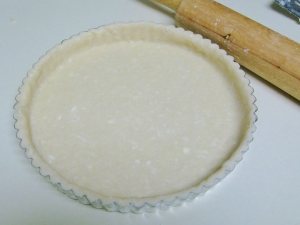
Et voila.
Carefully place a sheet of foil (buttered, buttery side down) into your shell and fill with dry rice, beans, or pie weights if you’re lucky enough to own some. This will keep the shell from rising up in the center and ruining your lovely flat surface or, perish the thought, cracking. The rice and beans will be fine to keep afterwards; just put them in a container and let them cool off.
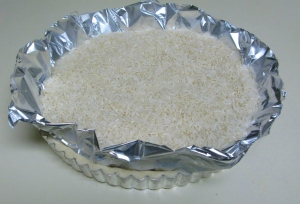
Silly but necessary.
Bake it up for 10 minutes (I recommend putting it on a baking sheet for easier transfer), then carefully remove the foil (please don’t dump rice into your partially cooked tart shell…) and bake again for 20 minutes or until the edges are golden brown. Take it out and let it cool completely. I tented my shell with foil after it was cool and kept it for a day before using it. It was still perfect.
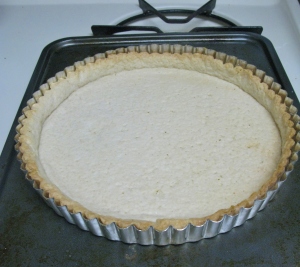
Tender and buttery and perfect.
ONTO THE CUSTARD!!!
Citrus Cognac Custard Ingredients
- 5 egg yolks, room temperature
- 3/4 cup sugar
- 3 tbsp cornstarch
- 1 1/2 cups, plus 1 tbsp kept separate, whole milk
- 1 tsp citrus zest (I used grapefruit because I still have a ton, but lemon might be easier for you)
- 1/2 tsp vanilla extract
- 2 tsp Cognac (please don’t cook with anything you wouldn’t drink)
- 1 tbsp butter
Here is where the KitchenAid comes in. Using the paddle attachment, mix the yolks and sugar on medium speed until it gets thick, fluffy, and pale yellow. It should take somewhere between 3 and 5 minutes. Slow it down and evenly sprinkle in the cornstarch.
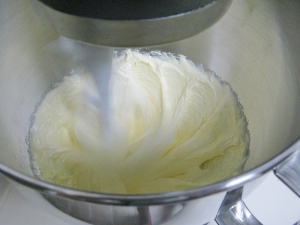
This is what you’re going for.
In a small saucepan, gently heat the milk (minus the extra tablespoon) and the zest together until it’s hot but not burning or boiling. Strain out the zest and get the milk into a pour-friendly container. Painfully slowly, so as to avoid curdling, pour the milk into the fluffy egg party (speed still on low). It will turn out looking like pre-gelled pudding. Throw this into a pot and get ready to watch it like a hawk. Cook it over medium heat, whisking constantly. Seriously, I mean constantly. This custard will turn from liquid to solid pudding mass in the time it takes you to blink. I thought I ruined it when I stepped away to take a sip of water.
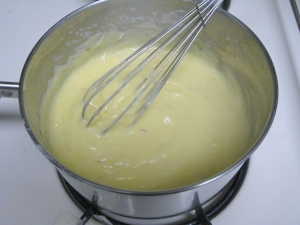
Here there be custard.
At this stage, remove it from the heat and quickly whisk in the vanilla, Cognac, butter, and reserved tablespoon of milk. Once the butter pat has melted in, push the custard through a strainer to get any chunky bits you may have missed with the whisk. It will ruin the consistency later if you don’t. Chill it up, with plastic wrap directly on the top to avoid getting a skin, until you’re ready to serve.
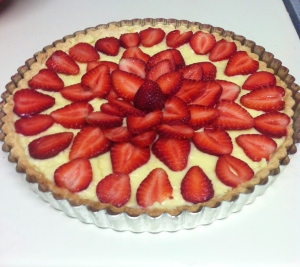
You can really put anything on top of this tart, but obviously I picked this specifically to use with my strawberries. So Slice up about a cup of berries any way you want – halves, thin slices, chunks, whatever! No more than an hour or two before serving, smooth the custard into the tart shell and artfully arrange your berries on top. Remove carefully from the tart pan (it should be very easy if your shell came out correctly) and slice with a very sharp knife. Enjoy with or without whipped cream (I’m looking at you, Ivy Cadle).
So many tart puns, so little time.